So you want chicken that’s juicy, crispy, and doesn’t require you to stress about gluten? Smart move. Whether you’re actually gluten-free or just trying to impress that one friend who “can’t do gluten anymore,” these baked chicken hindquarters are about to become your go-to flex. They’re easy, they’re tasty, and honestly? They make you look way more competent in the kitchen than you might actually be. No judgment here.
Why Gluten-Free Baked Chicken Hindquarters Recipe is Awesome
Let me break it down for you. First off, chicken hindquarters (aka leg quarters—thigh and drumstick still holding hands) are dirt cheap compared to those bougie chicken breasts everyone’s obsessed with. Plus, they’re basically impossible to dry out, which means even if you zone out watching TikTok while they’re in the oven, you’ll probably be fine.
This recipe is gluten-free without even trying. No weird substitutions, no strange flours—just regular ingredients that happen to not have gluten. It’s like accidentally doing something healthy while thinking you’re just making dinner.
The skin gets ridiculously crispy (we’re talking audible crunch), the meat stays juicy, and the whole thing takes maybe 10 minutes of actual effort. The oven does all the heavy lifting while you pretend to be productive. Also, minimal dishes. You’re welcome.
Honestly, if you’re into easy chicken recipes that don’t require gluten, you’re in the right place. We’ve got a whole thing going on here with gluten-free chicken thigh recipes that’ll blow your mind—but today we’re talking about the whole leg quarter because, let’s face it, more meat = more happy.
Chicken Hindquarters Recipe Ingredients You’ll Need
Grab these bad boys:
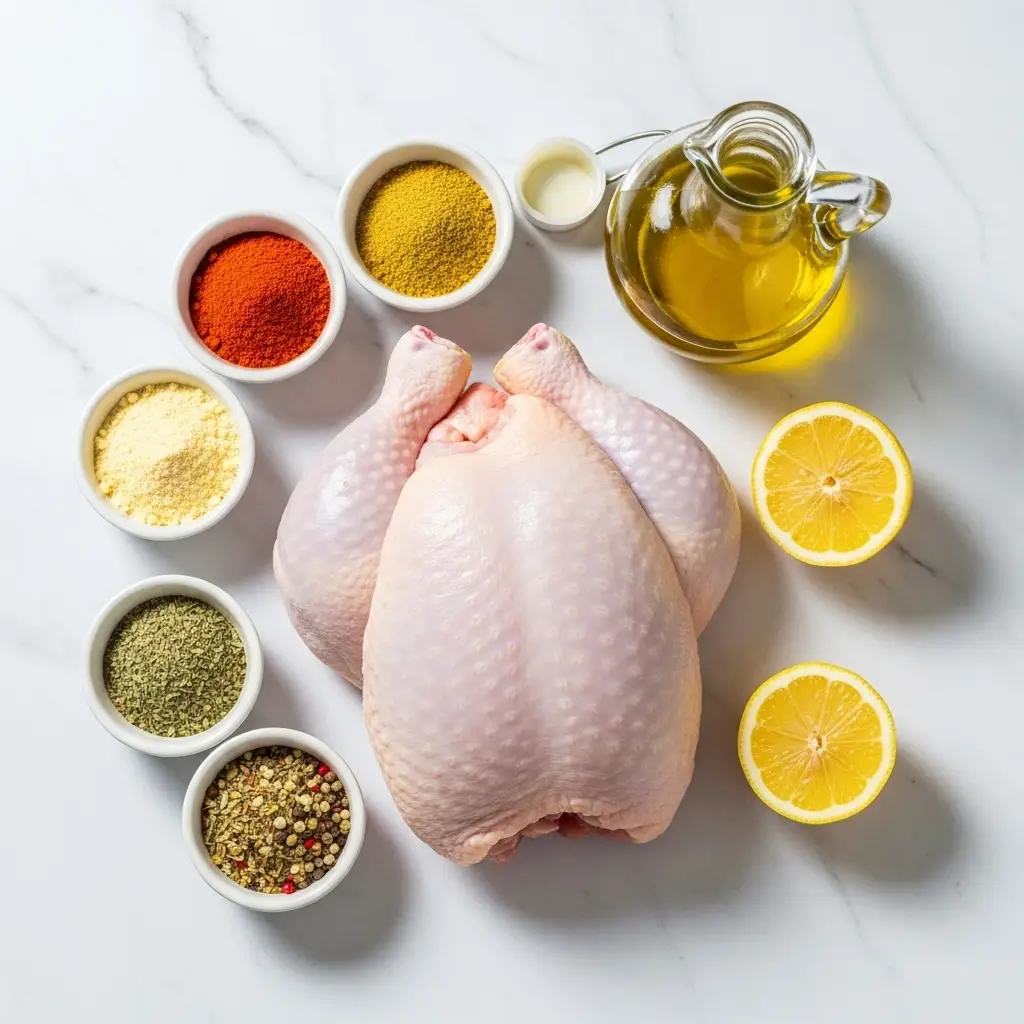
- 4 chicken hindquarters (also called leg quarters—usually comes with the drumstick attached to the thigh)
- 3 tablespoons olive oil (or whatever oil you’ve got lying around, honestly)
- 2 teaspoons paprika (the pretty red powder that makes everything look fancy)
- 1 teaspoon garlic powder (not garlic salt—don’t mess this up)
- 1 teaspoon onion powder (same deal)
- 1 teaspoon dried thyme (or rosemary if you’re feeling Mediterranean)
- 1 teaspoon salt (maybe a bit more if you’re a salt fiend like me)
- ½ teaspoon black pepper (freshly ground if you’re fancy)
- ½ teaspoon smoked paprika (optional, but it adds that “what IS that flavor?” vibe)
- 1 lemon (for squeezing at the end because we’re classy like that)
That’s it. No breadcrumbs, no flour coating, no complicated marinades you need to plan 24 hours in advance.
Step-by-Step Instructions
Ready? Let’s do this.
1. Preheat your oven to 425°F (220°C). Yeah, I know, preheating feels like a waste of time. Do it anyway. Trust me on this one.
2. Pat the chicken dry with paper towels. This sounds weird but it’s crucial. Wet chicken = soggy skin. Dry chicken = crispy heaven. Science.
3. Mix your spices together in a small bowl. Paprika, garlic powder, onion powder, thyme, salt, pepper, and smoked paprika if you’re using it. Give it a good stir so everything’s friends.
4. Rub the chicken with olive oil. Get in there with your hands (wash them first, obviously). Make sure every inch of that chicken is coated. Don’t be shy.
5. Season generously with your spice mix. Sprinkle it all over like you’re bedazzling a denim jacket. Flip the pieces and get the other side too. Use all of it—this is not the time for moderation.
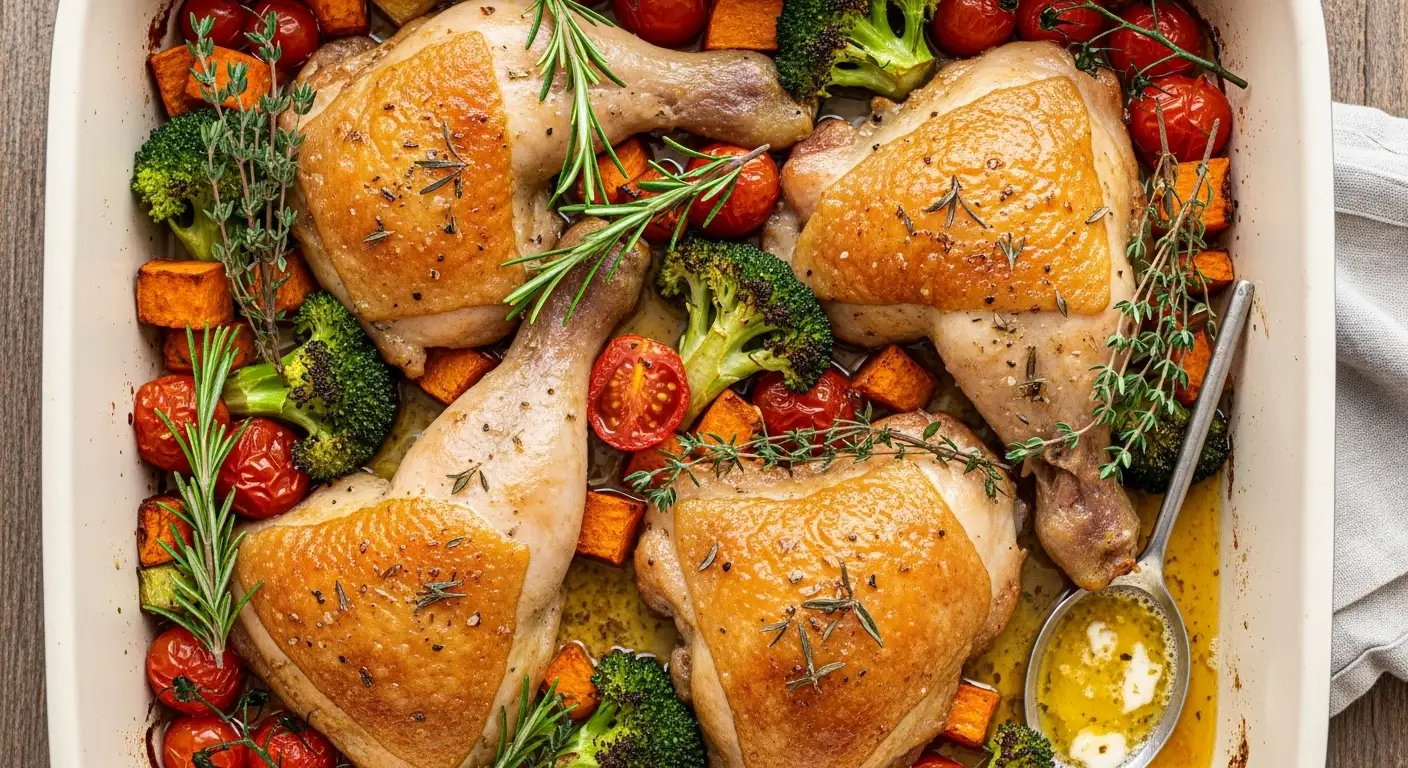
6. Place the chicken on a baking sheet. Use parchment paper or a wire rack if you want to get fancy. Skin-side up is the move here. Give each piece some personal space—nobody likes being crowded.
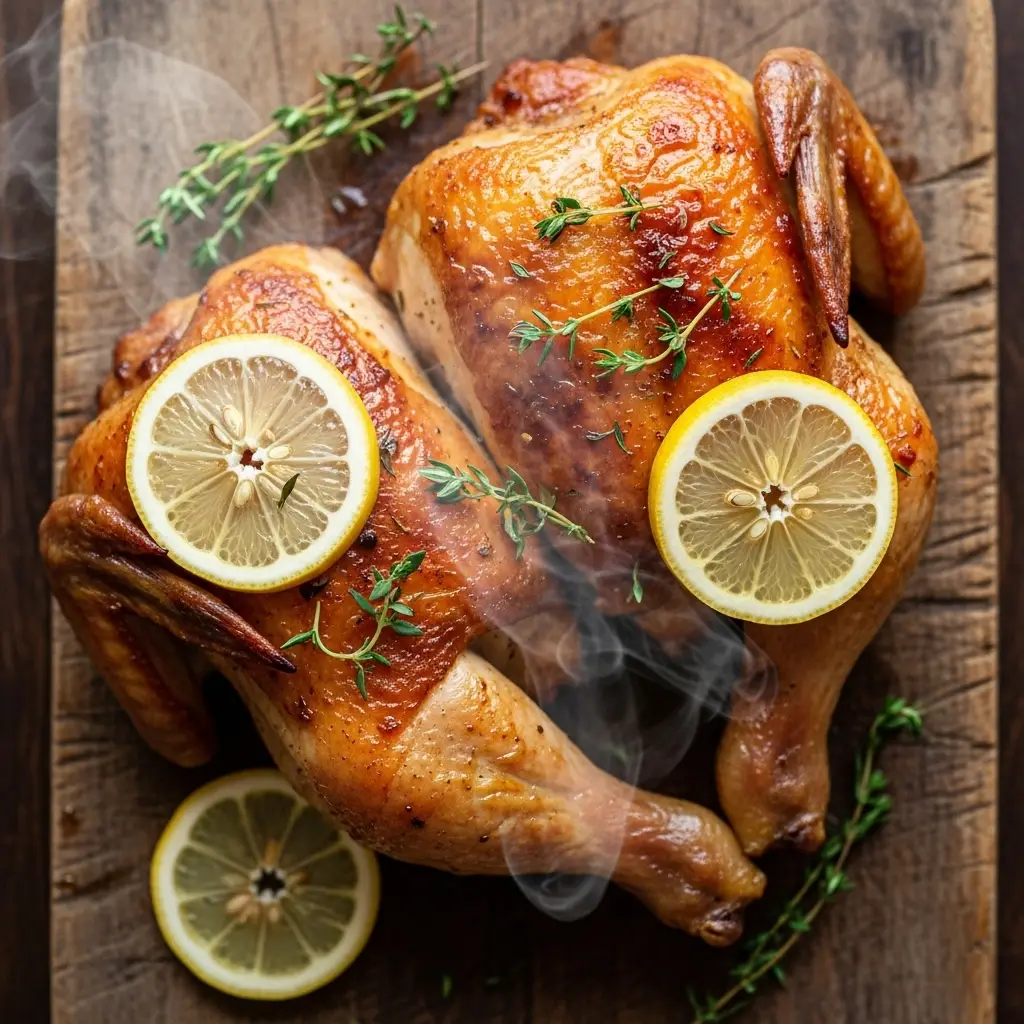
7. Bake for 45-50 minutes. You’re looking for an internal temp of 165°F (75°C) if you have a meat thermometer. If you don’t, the juices should run clear and the skin should be golden and crispy.
8. Let it rest for 5 minutes. I know you want to dive in immediately, but give it a hot second. The juices need to redistribute or something. IDK, just do it.
9. Squeeze fresh lemon over the top and serve. Chef’s kiss.

Common Mistakes to Avoid
Let’s talk about how not to screw this up:
Not drying the chicken properly. Seriously, this is the number one reason people end up with sad, rubbery skin. Paper towels are your friend.
Overcrowding the pan. If your chicken pieces are touching, they’re steaming instead of roasting. That’s how you end up with disappointment instead of dinner.
Skipping the preheat. I get it, you’re hungry. But throwing chicken into a cold oven messes with the cooking time and texture. Just wait the extra 10 minutes.
Using garlic salt instead of garlic powder. Then adding regular salt on top. Congrats, you just made a salt lick with chicken attached.
Checking the chicken every five minutes. Opening the oven door drops the temperature. Leave it alone and let it do its thing. You’re not that interesting anyway.
Alternatives & Substitutions
Got different stuff in your pantry? No problem.
Swap olive oil for melted butter or avocado oil. Both work great. Butter adds extra richness, avocado oil has a higher smoke point.
No paprika? Use chili powder or cayenne if you want heat, or just skip it and add more of the other spices.
Fresh herbs instead of dried? Go for it—triple the amount since fresh herbs are less concentrated. Fresh thyme or rosemary are chef’s kiss.
Want it spicier? Add some cayenne pepper or red pepper flakes to the spice mix. Start small though—you can always add more heat, but you can’t take it back.
Different cuts of chicken? This works with drumsticks, thighs, or even wings. Just adjust the cooking time—smaller pieces need less time. Actually, if you’re all about that thigh life, check out our gluten-free chicken thigh recipes for more ways to make dark meat shine.
FAQ (Frequently Asked Questions)
Can I use chicken breasts instead?
Sure, but why would you do that to yourself? Breasts dry out way easier and they’re more expensive. But if you must, reduce the cooking time to about 25-30 minutes.
Do I need to marinate the chicken?
Nope! The oil and spices create enough flavor. But if you want to marinate for 30 minutes to a few hours, knock yourself out.
Can I make this ahead?
You can season the chicken and keep it in the fridge for up to 24 hours before baking. Actually makes the flavors even better. But don’t cook it ahead—reheated chicken is never the same.
Is the skin really gluten-free?
Yes! Chicken skin is naturally gluten-free. It’s just… skin. The only gluten concern would be if you used a seasoning blend with hidden gluten, so check your labels if you’re seriously celiac.
What should I serve with this?
Roasted veggies, rice, salad, mashed potatoes, literally anything. It’s chicken—it goes with everything. I’m partial to roasted broccoli and some garlic rice, FYI.
Can I use frozen chicken?
Thaw it completely first. Cooking from frozen will give you uneven results—burned outside, raw inside. Not cute.
How do I know when it’s done?
Get a meat thermometer—they’re like $10 and worth every penny. Internal temp should hit 165°F. Or cut into the thickest part and make sure the juices run clear, not pink.

- 【Easy to Use】Easily release the meat probe at the push of a button, and control the backlight or power with another butt…
- 【More Accurate Readout in Seconds】Get accurate temperature readings with an impressive +/-0.9°F precision, this cooking …
- 【Easy to Read】The large, easy-to-read numbers and bright backlit display make this grill thermometer simple to check you…
Final Thoughts
There you have it—crispy, juicy, gluten-free chicken that requires minimal effort and makes you look like you actually know your way around a kitchen. It’s the kind of recipe you can make on a random Tuesday or serve to guests without breaking a sweat.
The best part? Nobody needs to know how easy this was. Let them think you slaved away. You’ve earned those compliments.
I’m Dr. Shivani, a Kolkata-based nutritionist since 2015. After 10 years of igniting a love for healthy eating in young minds as a High School nutritionist teacher, I now help individuals unlock their full potential through personalized diet plans. My passion for writing and sharing nutrition knowledge (through blogs and observations) keeps my practice fresh and fuels my love for the field!