These gluten free cinnamon roll Recipe are actually fluffy & delicious! Easy step-by-step recipe with simple ingredients. Perfect for breakfast or brunch treats.
So you went gluten-free and thought your cinnamon roll days were over? Yeah, I’ve been there—standing in the bakery aisle, staring longingly at those spiral beauties like they’re an ex who did me wrong. But plot twist: you can absolutely have pillowy, gooey, cinnamon-swirled perfection without the gluten. And no, they don’t taste like cardboard. Promise.
Why Gluten Free Cinnamon Roll Recipe is Awesome
Look, I’m not gonna sugarcoat it (well, actually these rolls are pretty sugary, but you get what I mean). Most gluten-free baking is a straight-up gamble. You’re mixing mystery flours, crossing your fingers, and praying to the baking gods that your creation doesn’t turn into a hockey puck.
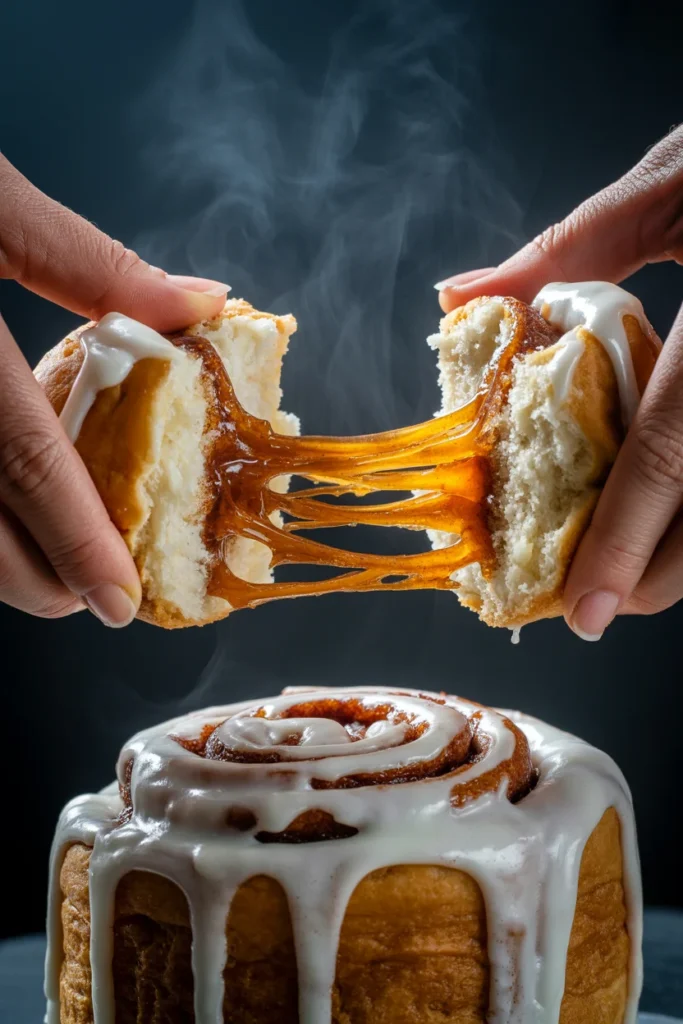
But these cinnamon rolls? They’re legit foolproof. The dough actually behaves like real dough—it rises, it rolls, it doesn’t crumble into sad little pieces. Plus, you get that classic sticky-sweet cinnamon filling and cream cheese frosting situation that makes regular cinnamon rolls so dangerous. The texture is soft and tender, not dense or gummy like some gluten-free disasters I’ve witnessed (and created, let’s be real).
Also, you don’t need seventeen weird ingredients you’ll never use again. Just straightforward stuff that won’t haunt your pantry for eternity.
Ingredients You’ll Need
For the Dough:
- 2¾ cups gluten-free all-purpose flour blend (one with xanthan gum already in it—make your life easier)
- ¼ cup granulated sugar
- 1 packet (2¼ tsp) instant yeast (the quick-rise kind, because patience is overrated)
- 1 tsp salt
- ¾ cup warm milk (dairy or non-dairy, I don’t judge)
- ¼ cup melted butter
- 2 large eggs, room temperature
- 1 tsp vanilla extract
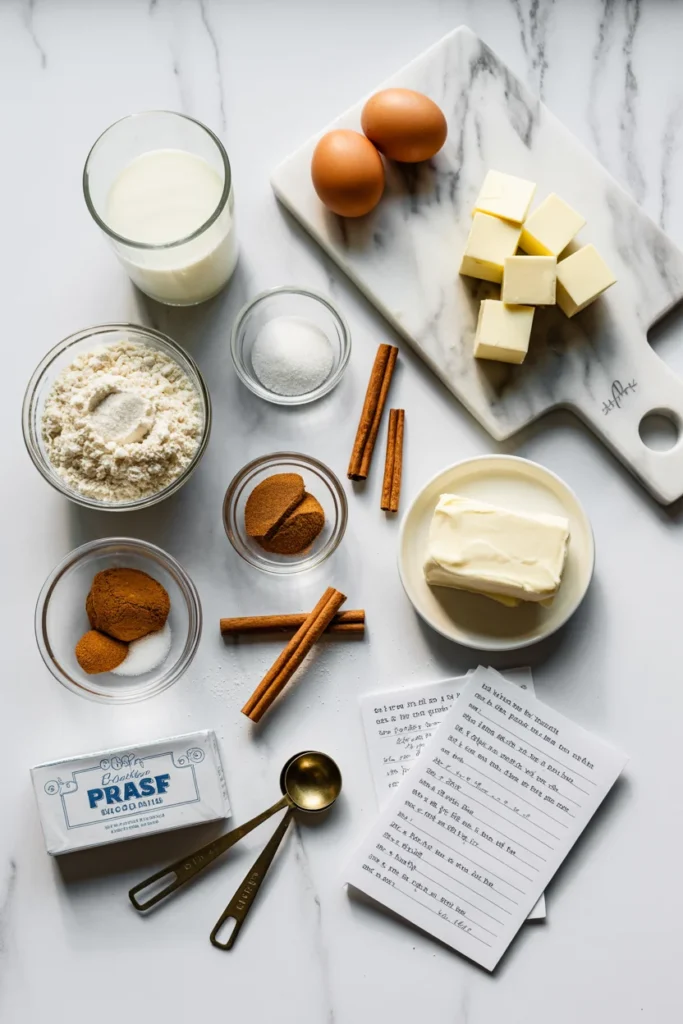
For the Filling:
- ½ cup softened butter (don’t even think about skipping this step)
- ¾ cup brown sugar
- 2 tbsp cinnamon (go ahead, be generous)
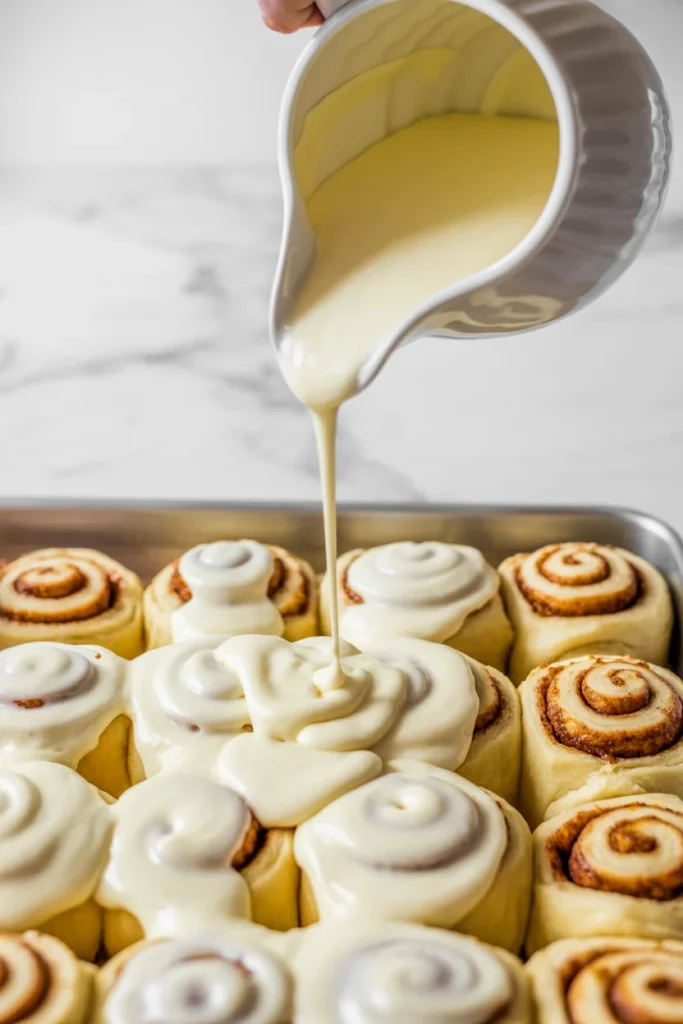
For the Frosting:
- 4 oz cream cheese, softened
- 2 tbsp butter, softened
- 1 cup powdered sugar
- 1 tsp vanilla extract
- 2–3 tbsp milk (to get it perfectly spreadable)
Step-by-Step Instructions
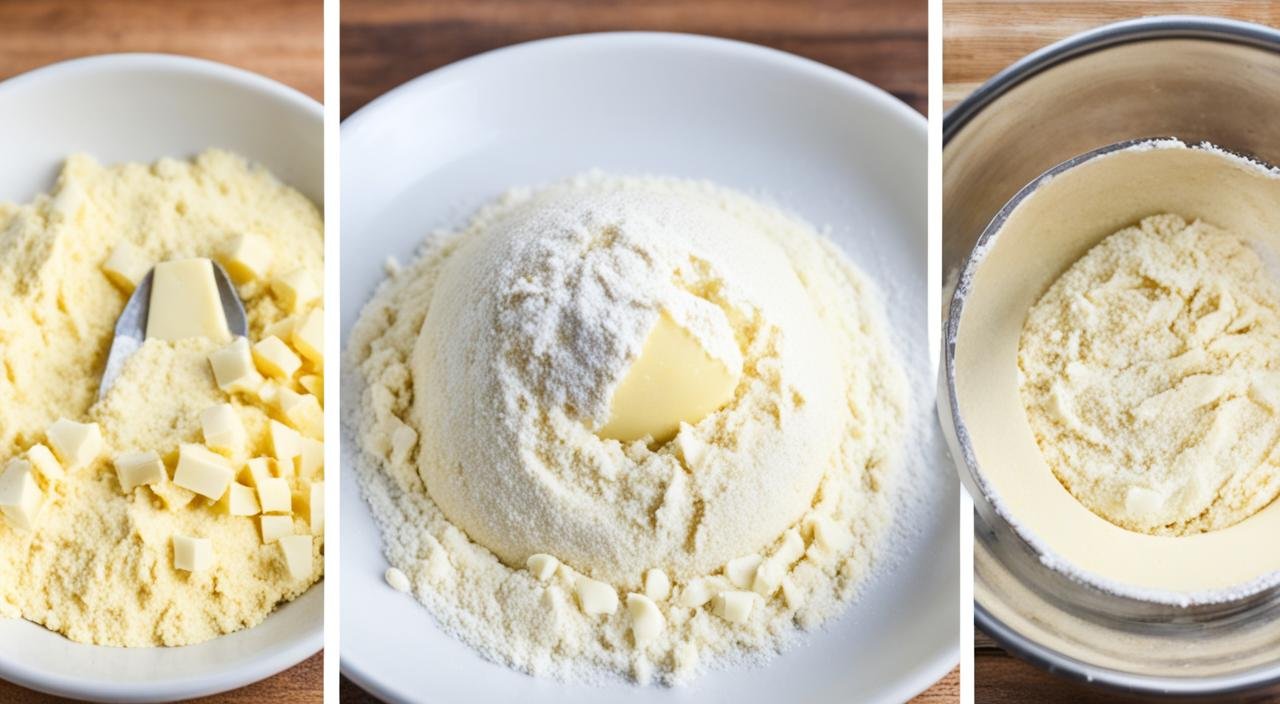
1. Mix your dry ingredients. Whisk together the flour, sugar, yeast, and salt in a large bowl. This is the boring part, but it’s important—don’t skip it unless you enjoy lumpy dough.
2. Combine the wet stuff. In another bowl, mix your warm milk, melted butter, eggs, and vanilla. Make sure the milk isn’t too hot or you’ll murder the yeast. Aim for lukewarm—like bath water that’s been sitting for a minute.
3. Bring it all together. Pour the wet ingredients into the dry and mix until you’ve got a sticky dough. It’s gonna be stickier than regular dough, and that’s totally normal. Don’t panic.
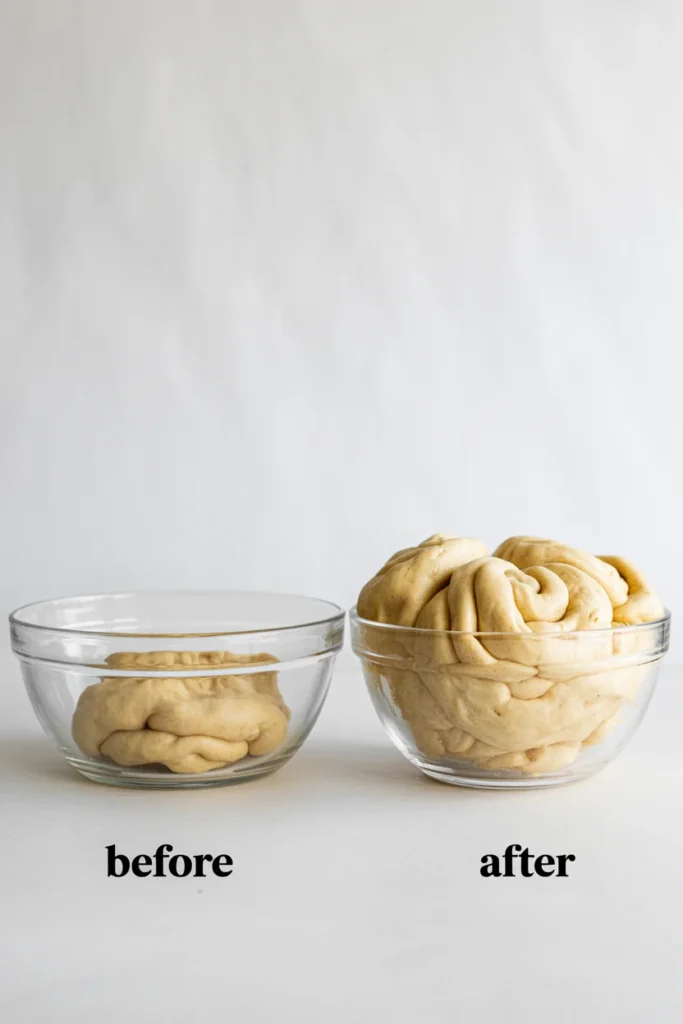
4. Let it rise. Cover the bowl with a damp towel and let it chill in a warm spot for about an hour, or until it’s doubled in size. This step is non-negotiable. I know waiting is the worst, but trust the process.
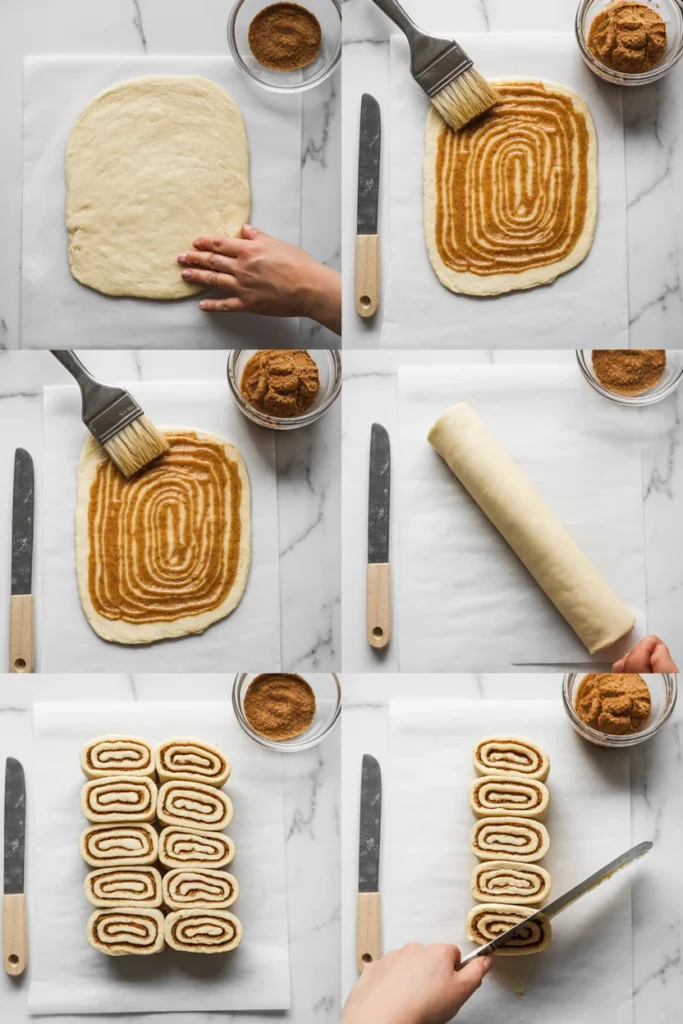
5. Roll it out. Lightly flour your surface (with more GF flour) and roll the dough into a rectangle—roughly 12×18 inches. It doesn’t have to be perfect; we’re making cinnamon rolls, not origami.
6. Spread the magic. Slather that softened butter all over the dough, leaving just a tiny border. Mix your brown sugar and cinnamon together, then sprinkle it generously over the butter. More is more here.
7. Roll it up. Starting from the long edge, roll the dough into a log. Try to keep it tight but not so tight that the filling squishes out everywhere. Use a sharp knife or dental floss (yes, really) to cut it into 12 rolls.
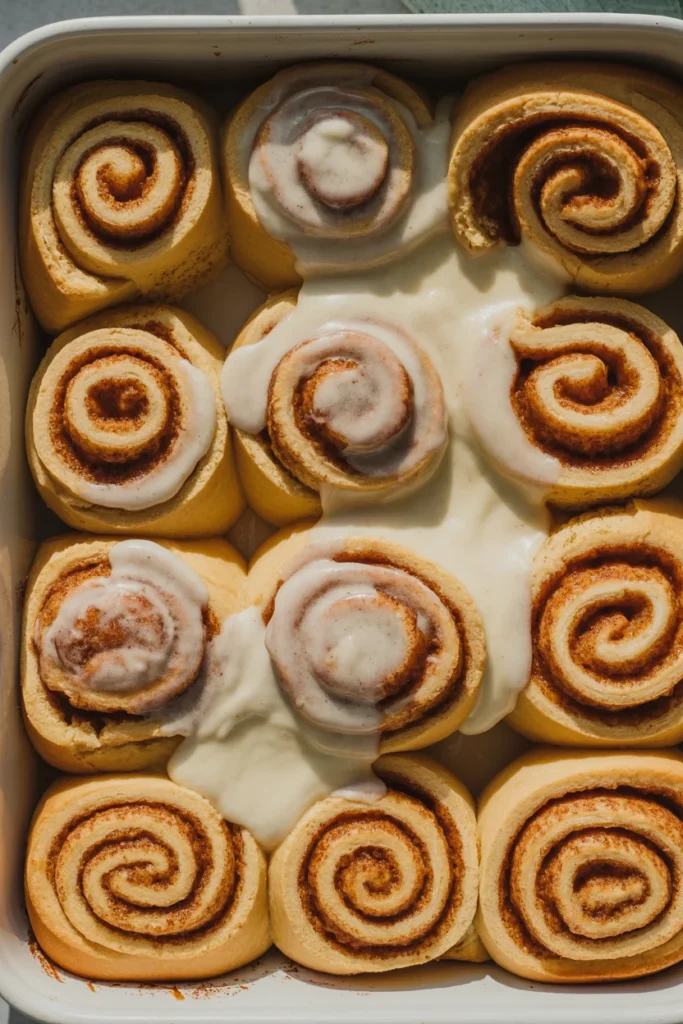
8. Second rise. Place your rolls in a greased 9×13 pan, cover them, and let them rise again for 30 minutes. Yeah, more waiting. Go scroll your phone or something.
9. Bake ’em. Pop them in a preheated 350°F oven for 22–25 minutes until they’re golden on top. Your kitchen is about to smell incredible, FYI.
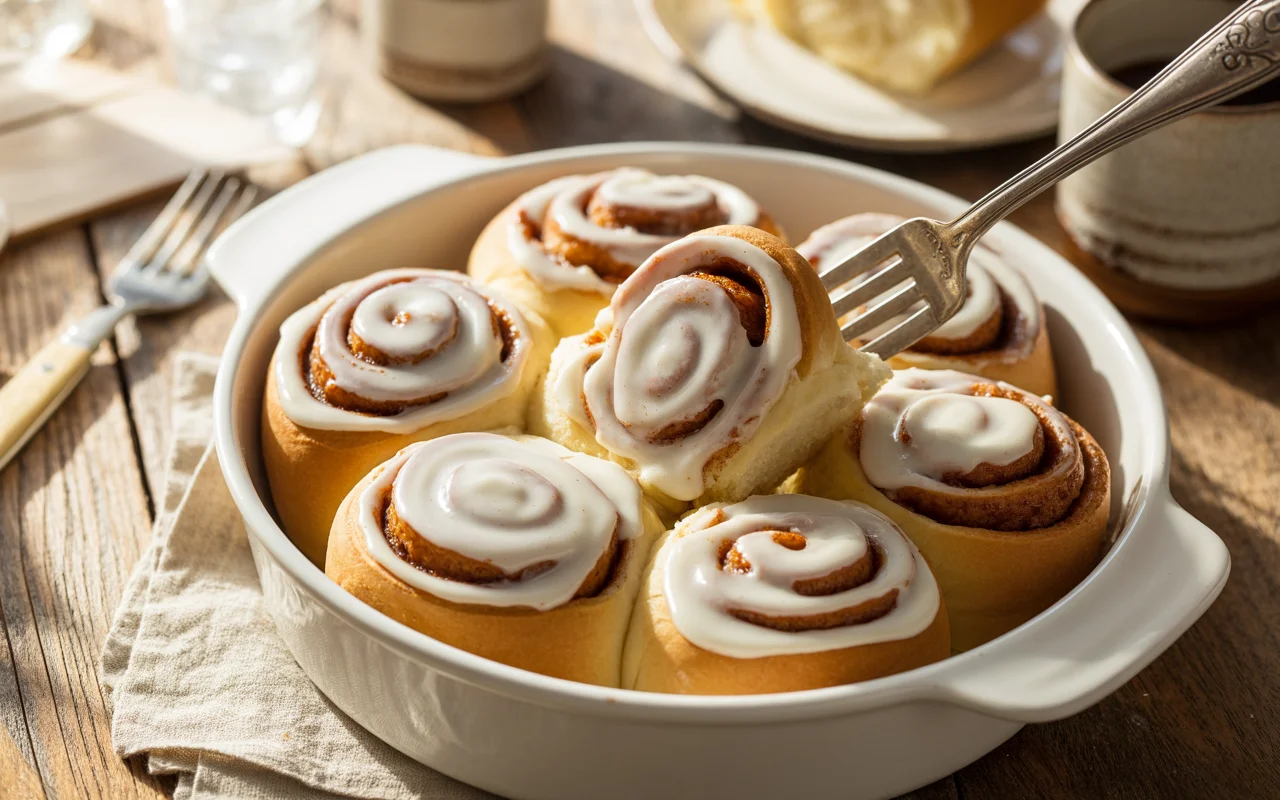
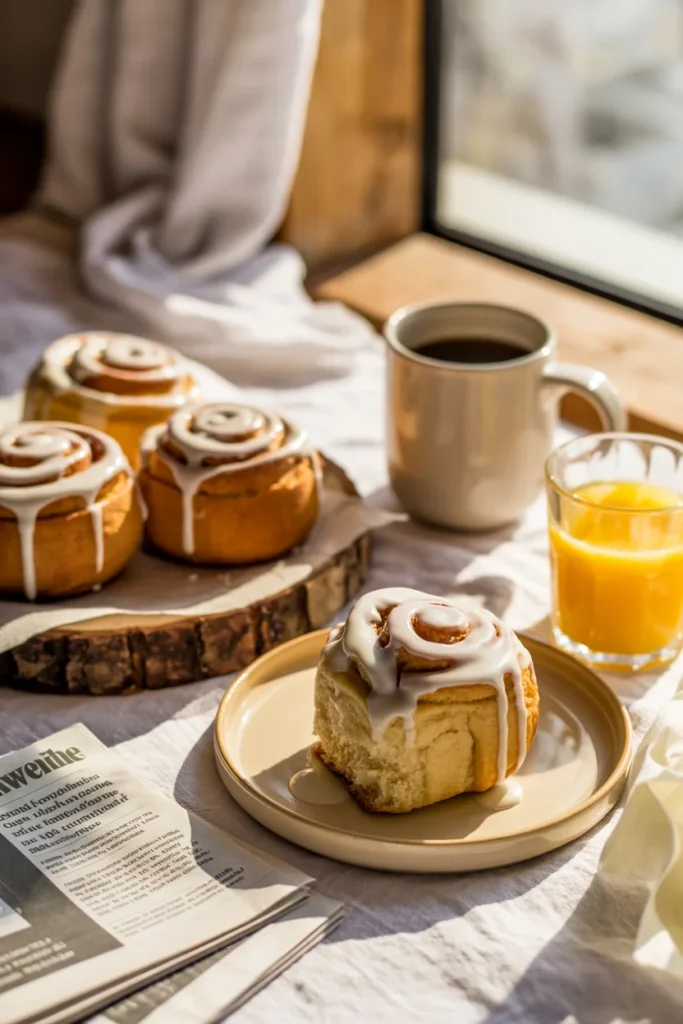
10. Frost while warm. Beat together all your frosting ingredients and spread it on the rolls while they’re still warm. Watch it melt into all those cinnamon swirls and try not to eat the entire pan immediately.


Common Mistakes to Avoid
Using cold ingredients. Room temperature eggs and softened butter make a huge difference. Don’t be impatient here—take stuff out of the fridge ahead of time.
Skipping the xanthan gum. If your flour blend doesn’t include it, add 1½ teaspoons. Without it, your dough will fall apart like a bad relationship.
Over-flouring when rolling. Yes, the dough is sticky, but dumping a ton of extra flour on it will make your rolls dry and dense. Use just enough to prevent sticking.
Cutting rolls with a dull knife. You’ll smoosh them into sad ovals. Use dental floss instead—slide it under the log, cross the ends over the top, and pull. Clean cuts every time.
Impatience with rising times. I know you want those rolls NOW, but if you rush the rise, you’ll get dense, disappointing results. Just wait.
Alternatives & Substitutions
Dairy-free? Use your favorite non-dairy milk and vegan butter. For the cream cheese frosting, there are solid dairy-free cream cheese options out there that work great.
No instant yeast? Active dry yeast works too—just proof it in the warm milk with a pinch of sugar for 5 minutes first before adding it to the mix.
Different spices? Throw in some cardamom or nutmeg with the cinnamon for a fancier vibe. Or add a tablespoon of orange zest to the filling because citrus + cinnamon is chef’s kiss.
Flour blend options? King Arthur Measure for Measure and Bob’s Red Mill 1-to-1 are my go-tos. Whatever you use, make sure it has xanthan gum or add your own.
Less sugar? You can cut the sugar in the dough down to 2 tablespoons if you want them less sweet. The filling and frosting are where the real sweetness lives anyway.
Final Thoughts
There you have it—gluten-free cinnamon rolls that don’t suck. Actually, they’re pretty damn amazing. The dough is manageable, the filling is gooey perfection, and the frosting situation is everything you could want.
And hey, if you’re on a GF baking kick (and why wouldn’t you be?), don’t stop here. Check out these gluten-free banana muffins for an easier weekday breakfast option, or level up your dessert game with gluten-free coconut cakes. Your kitchen’s already a mess—might as well keep the party going.
FAQ (Frequently Asked Questions)
Can I make these ahead of time?
Absolutely. Assemble the rolls the night before, cover them tightly, and stick them in the fridge. In the morning, let them sit at room temp for 30 minutes, then bake. Fresh cinnamon rolls for breakfast without the 6 AM panic? Yes, please.
Why is my dough so sticky?
Because gluten-free dough is just like that—embrace it. It’s supposed to be stickier than wheat dough. As long as you can roll it out with some flour on your surface, you’re good.
Can I freeze these?
Yep. Bake them, let them cool completely, wrap them individually, and freeze for up to 3 months. Thaw and reheat in the microwave for like 30 seconds. Almost as good as fresh.
Do I really need two rise times?
Unless you want dense, flat rolls, then yeah, you really do. The yeast needs time to work its magic. That’s literally what makes them fluffy.
Can I use a different pan size?
Sure, but your baking time might change. Smaller pan = thicker rolls = longer bake time. Bigger pan = thinner rolls = shorter bake time. Just keep an eye on them.
What if I don’t have cream cheese?
Make a simple glaze instead—just mix powdered sugar with milk and vanilla until it’s pourable. It’s not as decadent, but it still tastes great.
How long do these last?
They’re best within 2–3 days stored in an airtight container at room temp. But real talk, they never last that long in my house.
I’m Dr. Shivani, a Kolkata-based nutritionist since 2015. After 10 years of igniting a love for healthy eating in young minds as a High School nutritionist teacher, I now help individuals unlock their full potential through personalized diet plans. My passion for writing and sharing nutrition knowledge (through blogs and observations) keeps my practice fresh and fuels my love for the field!