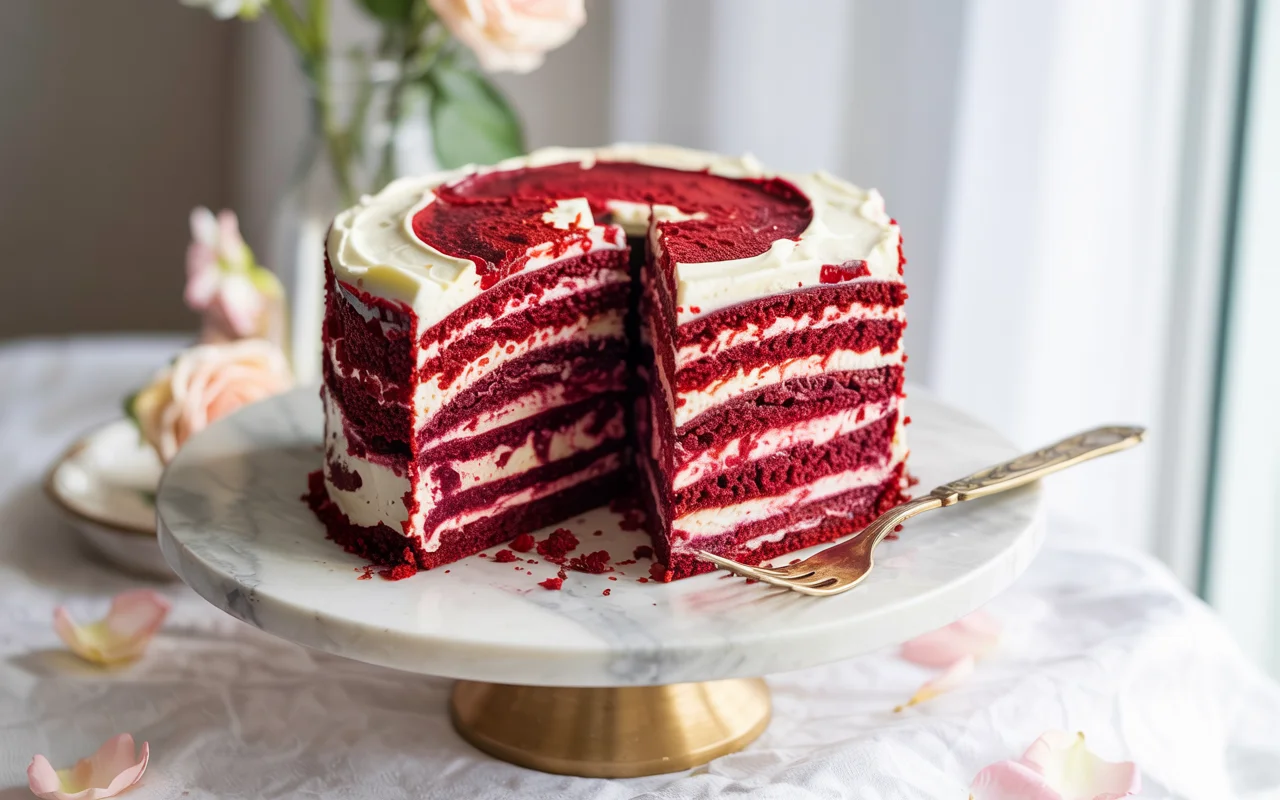
This gluten-free red velvet cake recipe is moist, easy to make, and perfect for Valentine’s Day. Get the fool-proof recipe with cream cheese frosting included!
So you want to bake something ridiculously romantic for Valentine’s Day but you’re gluten-free and kinda scared of cake recipes? Yeah, I get it. Red velvet seems like one of those fancy desserts that only food bloggers with perfect kitchens can pull off.
But here’s the thing—this gluten-free red velvet cake is actually way easier than you think, and it tastes like a cloud made of chocolate and cream cheese had a baby. Plus, it’s naturally gorgeous without you having to do anything extra. Win-win.
Whether you’re baking for someone special or just treating yourself (honestly, the better option), this cake delivers that perfect balance of cocoa-kissed sweetness, tangy cream cheese frosting, and that iconic red color that screams “I’m fancy but also fun.” And the best part? You don’t need any weird gluten-free baking superpowers to nail this.
Why Gluten-Free Red Velvet Cake Recipe is Awesome
Let me break down why this gluten-free red velvet cake is about to become your new favorite dessert:
It’s idiot-proof. Seriously, if I can make this without setting off the smoke alarm or creating a kitchen disaster zone, you definitely can. The steps are straightforward, and there’s no finicky technique required.
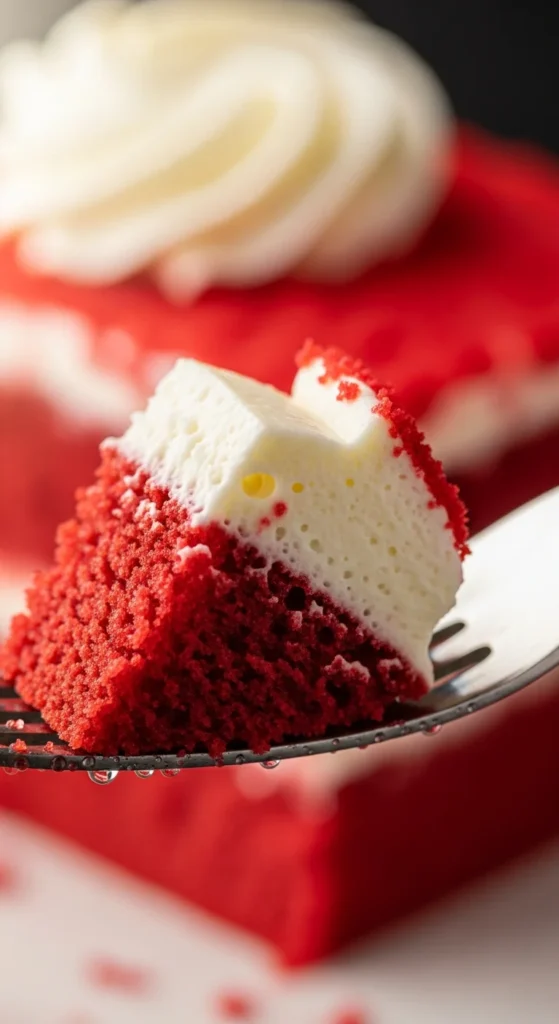
The texture is legit. None of that crumbly, sad gluten-free cake nonsense. This baby is moist, tender, and has that classic red velvet vibe. Your gluten-eating friends won’t even know the difference (and you don’t have to tell them if you don’t want to).
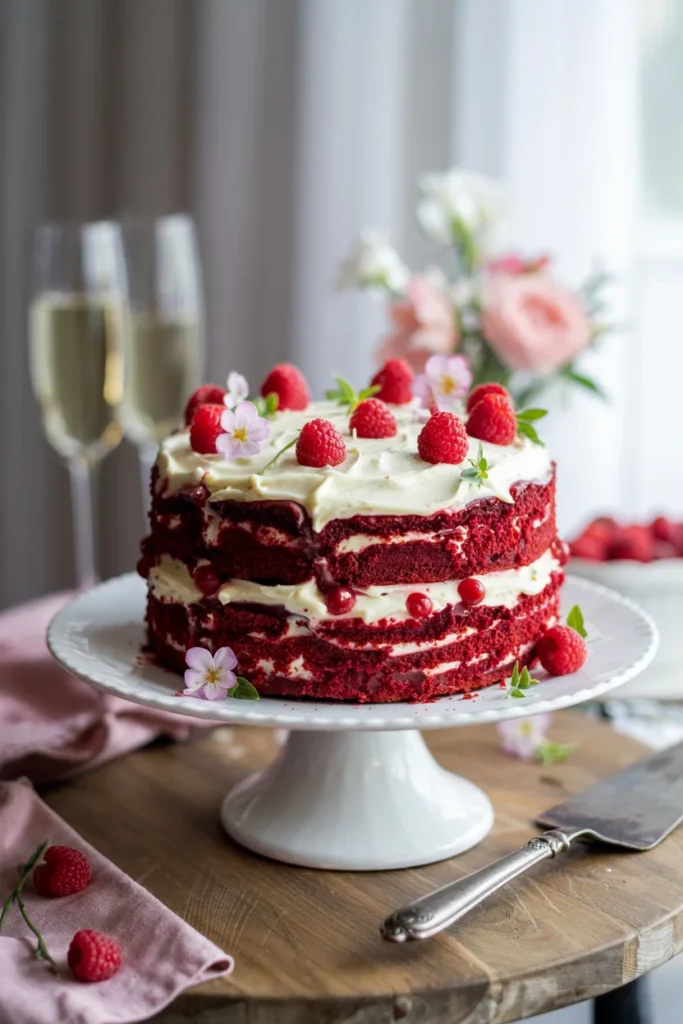
It looks impressive with zero effort. The natural red color does all the work for you. Slap on some cream cheese frosting, and suddenly you’re a baking genius in everyone’s eyes.
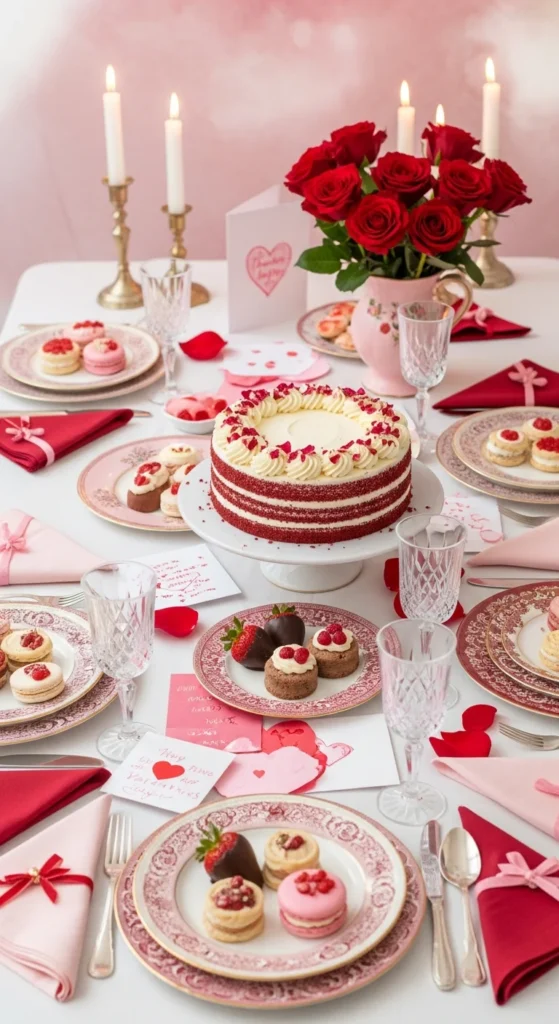
Valentine’s Day approved. Nothing says “I care about you” (or “I care about me”) like homemade cake. Plus, if you’re navigating the gluten-free life, this shows you can still indulge in all the good stuff.
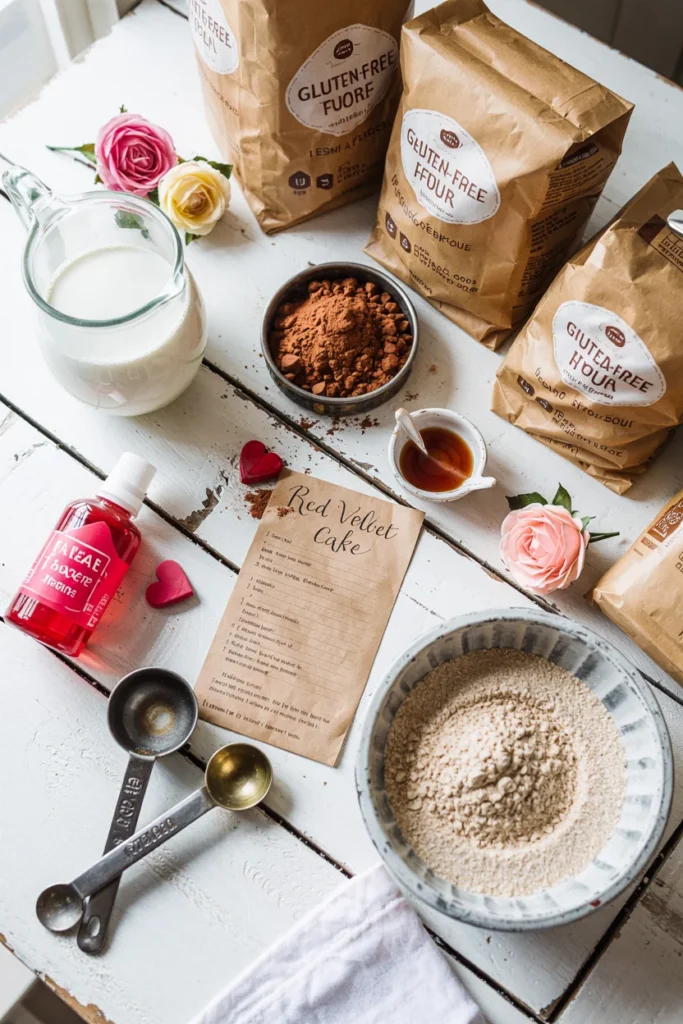
Ingredients You’ll Need
For the Cake:
- 2½ cups gluten-free all-purpose flour blend (make sure it has xanthan gum already mixed in, or add 1 tsp separately)
- 1½ cups granulated sugar (because life is short)
- 3 tablespoons unsweetened cocoa powder (the good stuff, not the chalky nonsense)
- 1½ teaspoons baking soda
- 1 teaspoon salt
- 2 large eggs (room temp, please)
- 1½ cups vegetable oil (or melted coconut oil if you’re feeling fancy)
- 1 cup buttermilk (or make your own with milk + vinegar—I’ll explain later)
- 2 tablespoons red food coloring (gel works better than liquid, FYI)
- 2 teaspoons vanilla extract
- 1 teaspoon white vinegar (trust the process)
For the Cream Cheese Frosting:
- 16 oz cream cheese (full fat, softened—don’t even think about low-fat)
- 1 cup unsalted butter (also softened)
- 4 cups powdered sugar (maybe more if you like it sweeter)
- 2 teaspoons vanilla extract
- Pinch of salt (because balance)
Step-by-Step Instructions
1. Preheat and prep. Set your oven to 350°F (175°C). Grease two 9-inch round cake pans and line them with parchment paper. This step prevents the “my cake is permanently stuck” tragedy.


2. Mix your dry ingredients. In a large bowl, whisk together the gluten-free flour, sugar, cocoa powder, baking soda, and salt. Get all those lumps out now—nobody wants surprise flour pockets in their cake.
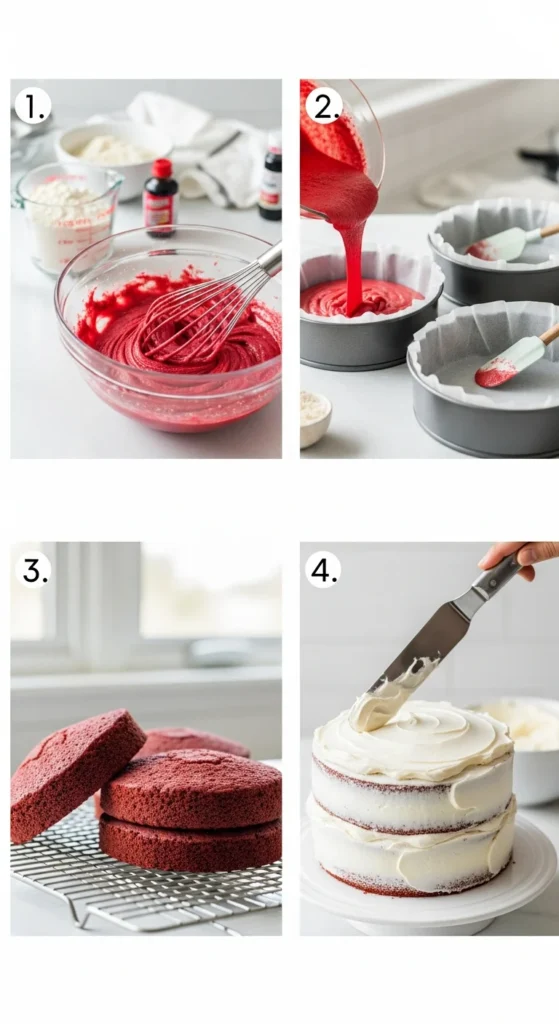
3. Combine the wet stuff. In another bowl, whisk the eggs, oil, buttermilk, food coloring, vanilla, and vinegar until smooth. Yes, the color will look aggressively red. That’s the point.
4. Bring it all together. Pour the wet ingredients into the dry ingredients and mix until just combined. Don’t overmix—you’re making cake batter, not training for an arm workout. The batter should be smooth but still slightly thick.
5. Bake it up. Divide the batter evenly between your two prepared pans. Bake for 25-30 minutes, or until a toothpick inserted in the center comes out clean (or with just a few moist crumbs). Every oven is different, so keep an eye on it after 25 minutes.


6. Cool completely. Let the cakes cool in the pans for 10 minutes, then turn them out onto wire racks. Do not try to frost warm cake—I repeat, do NOT. It will melt into a sad, frosting soup situation.
7. Make the frosting. Beat the softened cream cheese and butter together until fluffy (about 3-4 minutes). Gradually add the powdered sugar, vanilla, and salt. Beat until smooth and spreadable. Taste it. Adjust sweetness if needed. Try not to eat half of it with a spoon.
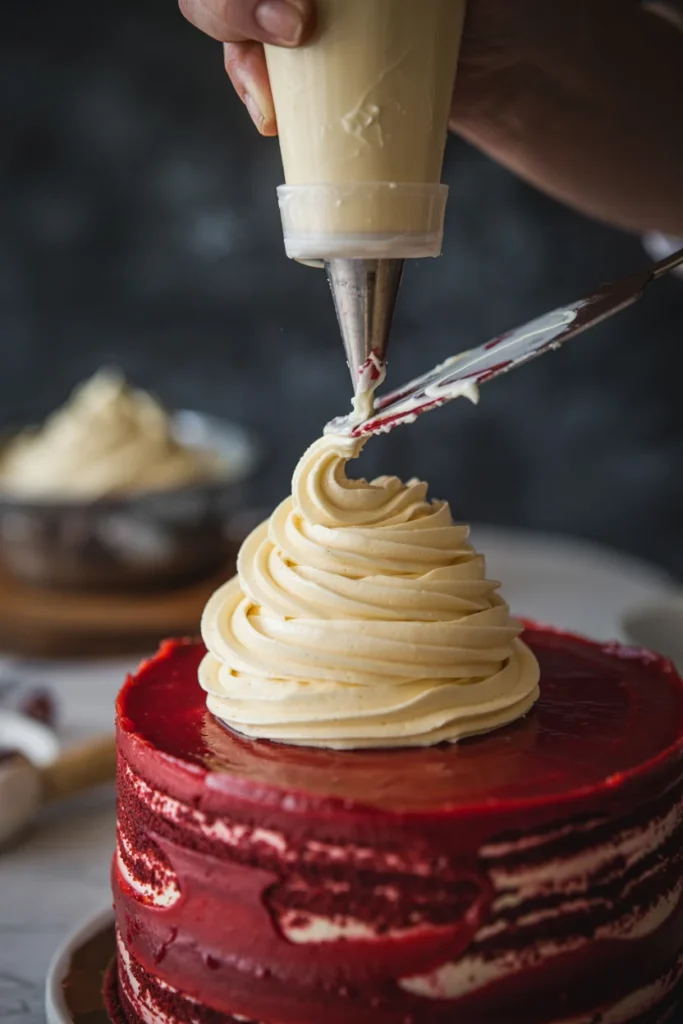
8. Assemble your masterpiece. Place one cake layer on your serving plate. Spread a thick layer of frosting on top. Add the second layer and frost the top and sides. If you want to get fancy, pipe some decorative swirls or add sprinkles. Or just smear it on and call it “rustic.”
Common Mistakes to Avoid
Using the wrong flour blend. Not all gluten-free flours are created equal. Stick with a good all-purpose blend that includes xanthan gum, or your cake might turn out dense and sad. Similar to making a gluten-free vanilla cake, the right flour blend makes all the difference.
Skipping the preheat. Look, I know you’re excited, but putting batter in a cold oven is a rookie move. Just wait the extra 10 minutes.
Overmixing the batter. Once you combine wet and dry ingredients, mix until just combined. Overmixing creates a tough, dense cake instead of the tender crumb you’re after.
Frosting a warm cake. I already said it, but I’ll say it again: let the cake cool completely. Warm cake + frosting = melted mess. Patience, young grasshopper.
Not measuring flour correctly. Scoop and level, people. Don’t pack it down or you’ll end up with too much flour and a dry cake.

Alternatives & Substitutions
No buttermilk? Mix 1 cup of regular milk (or dairy-free milk) with 1 tablespoon of white vinegar or lemon juice. Let it sit for 5 minutes until it curdles slightly. Boom—homemade buttermilk.
Want to make it dairy-free? Use dairy-free butter and cream cheese alternatives for the frosting. The cake itself can be made with coconut oil and a dairy-free milk + vinegar combo. Just know that the frosting texture might be slightly different depending on which brand you use.
Different sized pans? You can make this as a single-layer cake in a 9×13 pan (bake for 30-35 minutes), or as cupcakes (bake for 18-22 minutes). Just adjust the baking time accordingly.
Less red? If you’re not into the super-red look, you can cut the food coloring in half for a more subtle pink color. IMO, the bold red is half the fun, but you do you.
Frosting variations? Not a cream cheese frosting fan? (Are you okay?) You can use vanilla buttercream instead. Or try a chocolate ganache for something different—just like you might experiment with different toppings on a gluten-free strawberry shortcake.
Final Thoughts
There you have it—a gluten-free red velvet cake that doesn’t require a culinary degree or a prayer circle to pull off. Whether you’re making it for a romantic Valentine’s dinner, a Galentine’s celebration with friends, or just because it’s Tuesday and you deserve cake (valid), this recipe has your back.
The best part? Once you nail this, you’ll realize gluten-free baking isn’t the scary monster you thought it was. You might even get adventurous and try other celebration cakes, like a gluten-free mooncake when you’re feeling particularly ambitious.
So grab your mixing bowls, put on your favorite playlist, and get baking. Your taste buds (and anyone lucky enough to score a slice) will thank you. And hey, if it doesn’t turn out perfect the first time? That’s what the frosting is for—covers a multitude of sins. Now go impress someone—or yourself—with your new culinary skills. You’ve earned it!
FAQ (Frequently Asked Questions)
Can I make this cake ahead of time?
Absolutely! Bake the cake layers, let them cool completely, then wrap them tightly in plastic wrap and store at room temperature for up to 2 days. Or freeze them for up to 3 months. Frost the day you plan to serve it.
Why does my cake taste metallic?
Too much baking soda, my friend. Make sure you’re measuring accurately (level off that teaspoon!). The vinegar helps neutralize it, but excess baking soda will give you that weird aftertaste.
Can I skip the food coloring?
Sure, but then it’s just… chocolate cake. Which is still delicious, but not exactly red velvet. The color is kinda the whole vibe here.
How do I store leftover cake?
Cover it and keep it in the fridge for up to 5 days. The cream cheese frosting needs to stay cold. Let it come to room temp for about 20 minutes before serving for the best texture.
My cake came out dry. What happened?
Probably overbaked or too much flour. Check your oven temperature with an oven thermometer—most ovens run hot or cold. And make sure you’re measuring flour correctly (spoon it into the measuring cup, then level off).
Can I use gel food coloring instead of liquid?
Yes! Gel is actually better because it’s more concentrated and won’t thin out your batter. You’ll need less—start with 1-2 teaspoons and add more until you get the color you want.
Is this recipe safe for celiac disease?
As long as you use certified gluten-free ingredients and avoid cross-contamination in your kitchen, yes! Just double-check all your labels, especially on things like food coloring and vanilla extract.
I’m Dr. Shivani, a Kolkata-based nutritionist since 2015. After 10 years of igniting a love for healthy eating in young minds as a High School nutritionist teacher, I now help individuals unlock their full potential through personalized diet plans. My passion for writing and sharing nutrition knowledge (through blogs and observations) keeps my practice fresh and fuels my love for the field!